Starlink Gen 3 & Mini Flat Mount | Caravan RV Roof Mount
$58.92
-
DetailsSurvived Cyclone Alfred. Crossed the outback. Done 20,000+km across Australia — and still holding strong.
This is a genuine field-tested mount, not a prototype. We've run this design through everything Australia can throw at it: cyclone-force winds, corrugated outback tracks, coastal humidity, and 40°C+ heat. It holds at highway speed, releases in seconds when you need it, and looks after itself for years.
Backed by a 2-year replacement guarantee. No questions asked.
─────────────────────────────
WHAT YOU GET
─────────────────────────────
Choose your configuration at checkout:
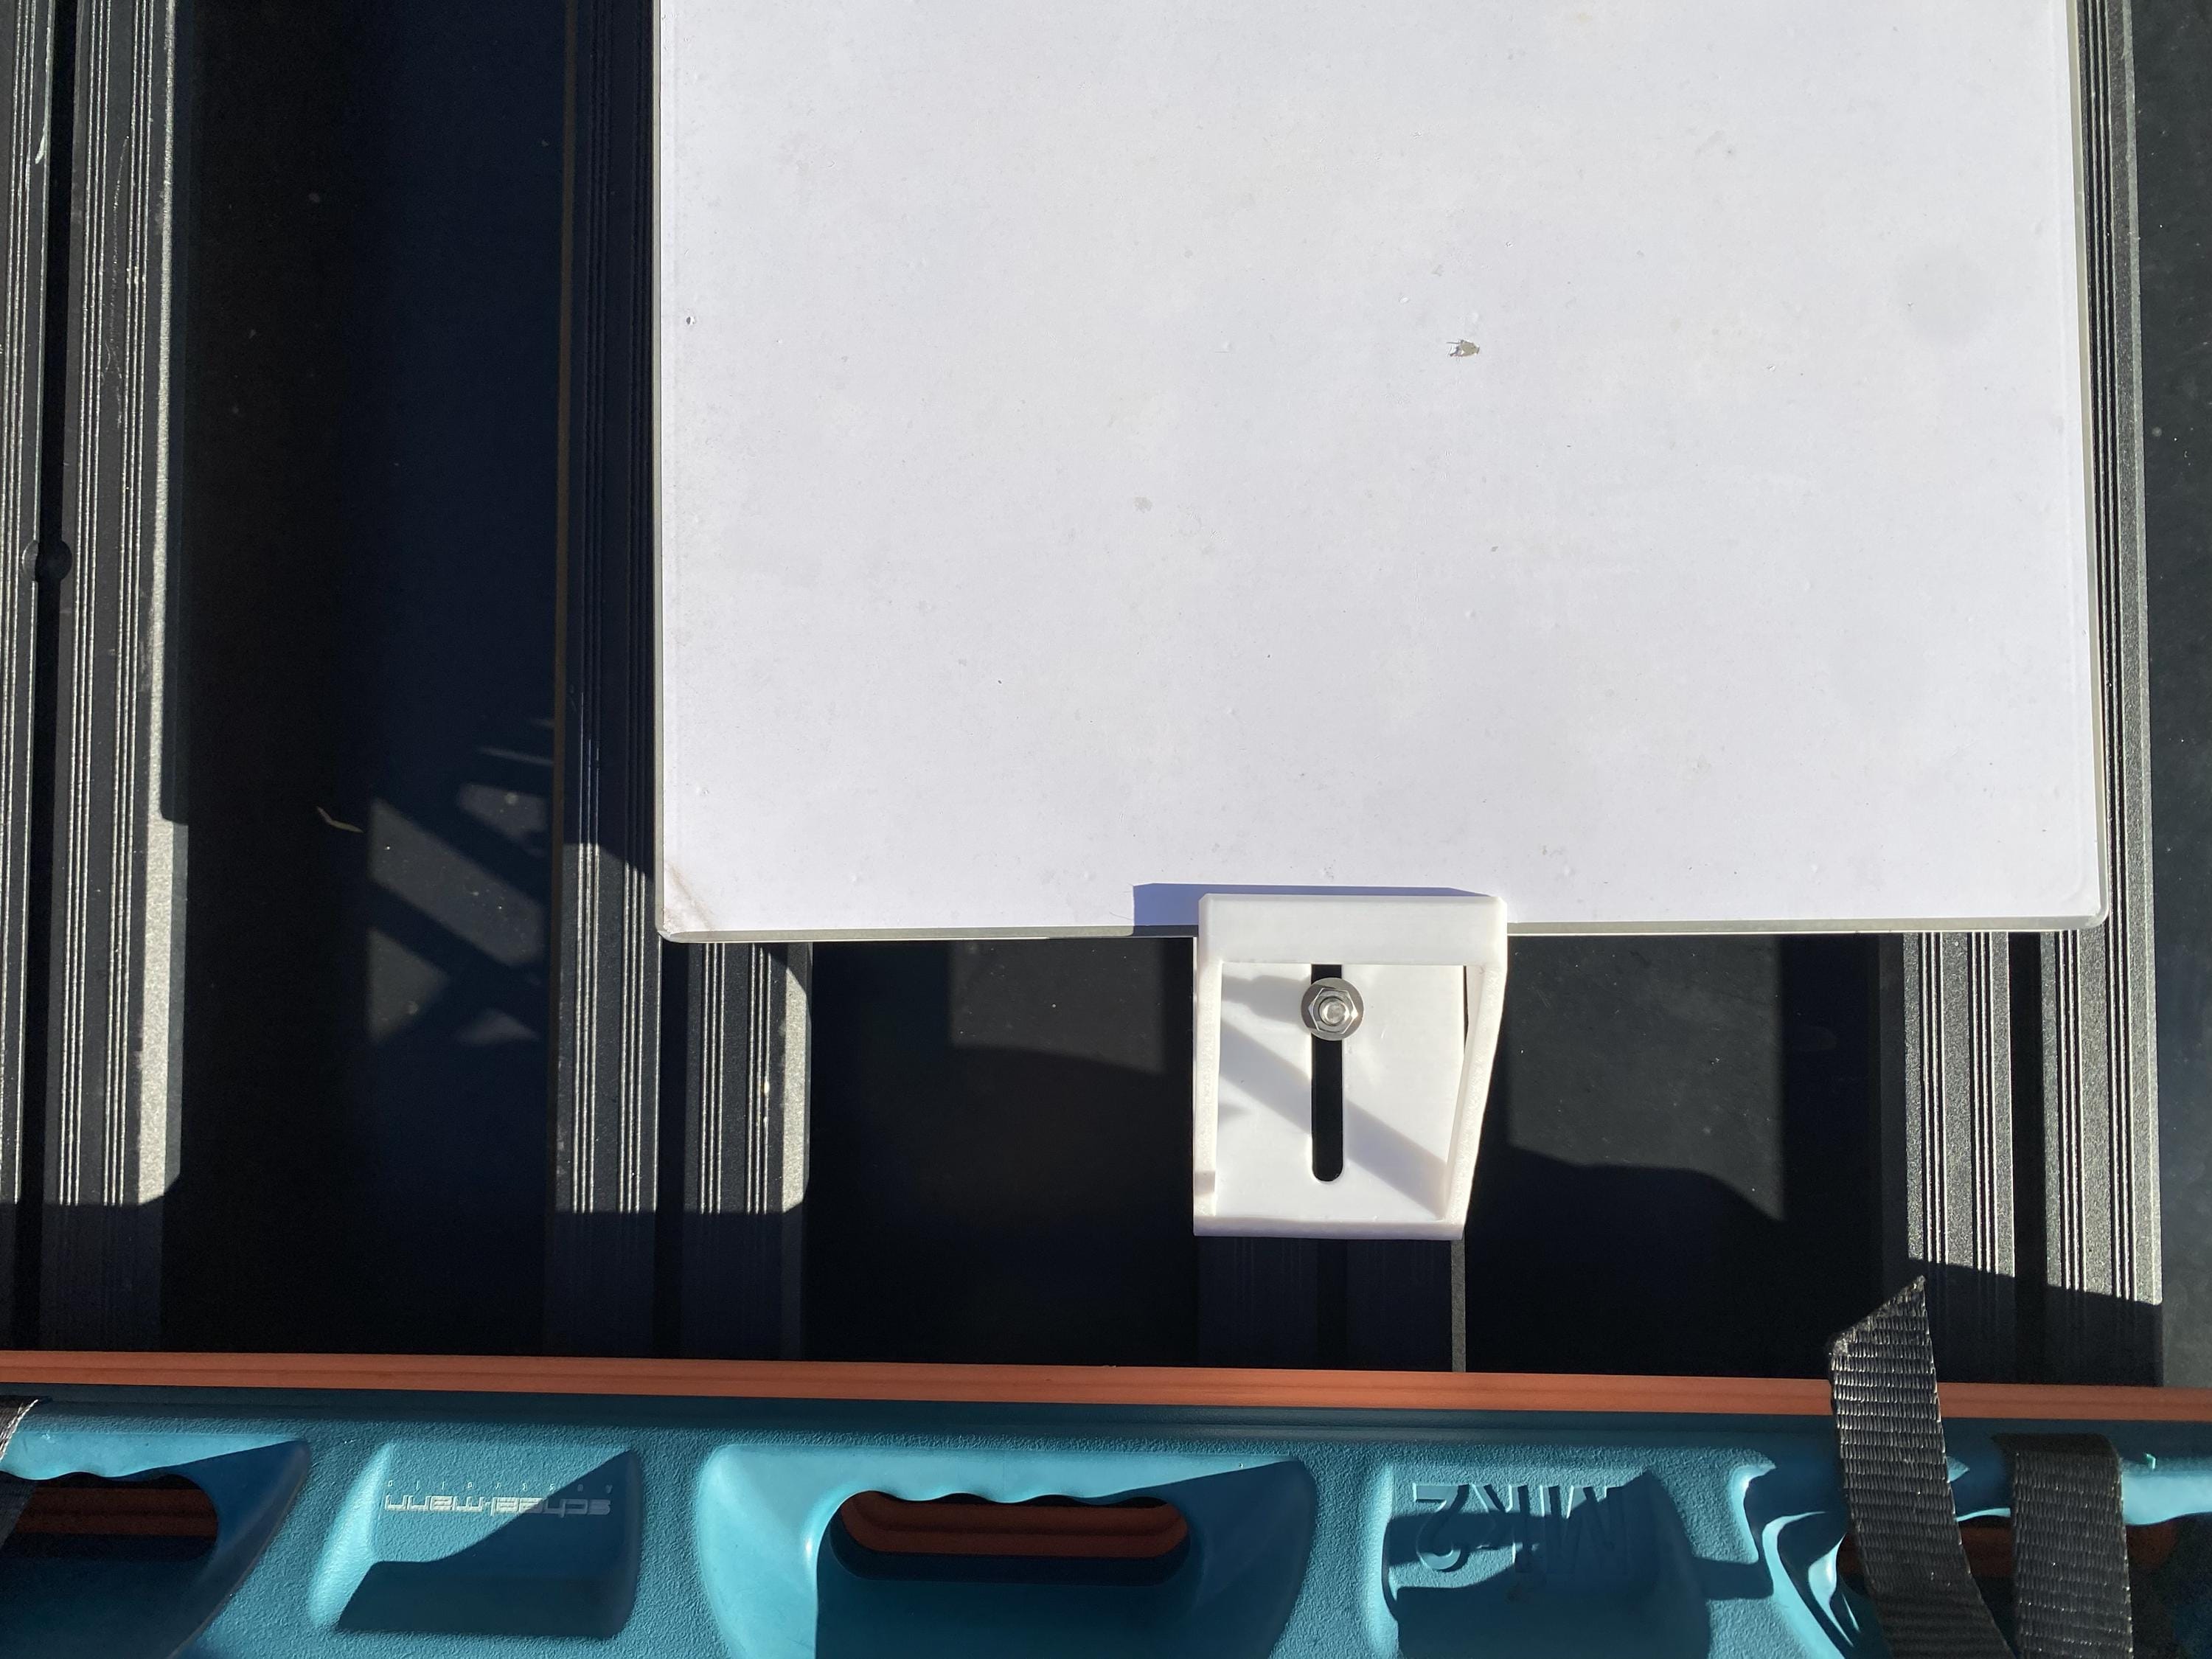
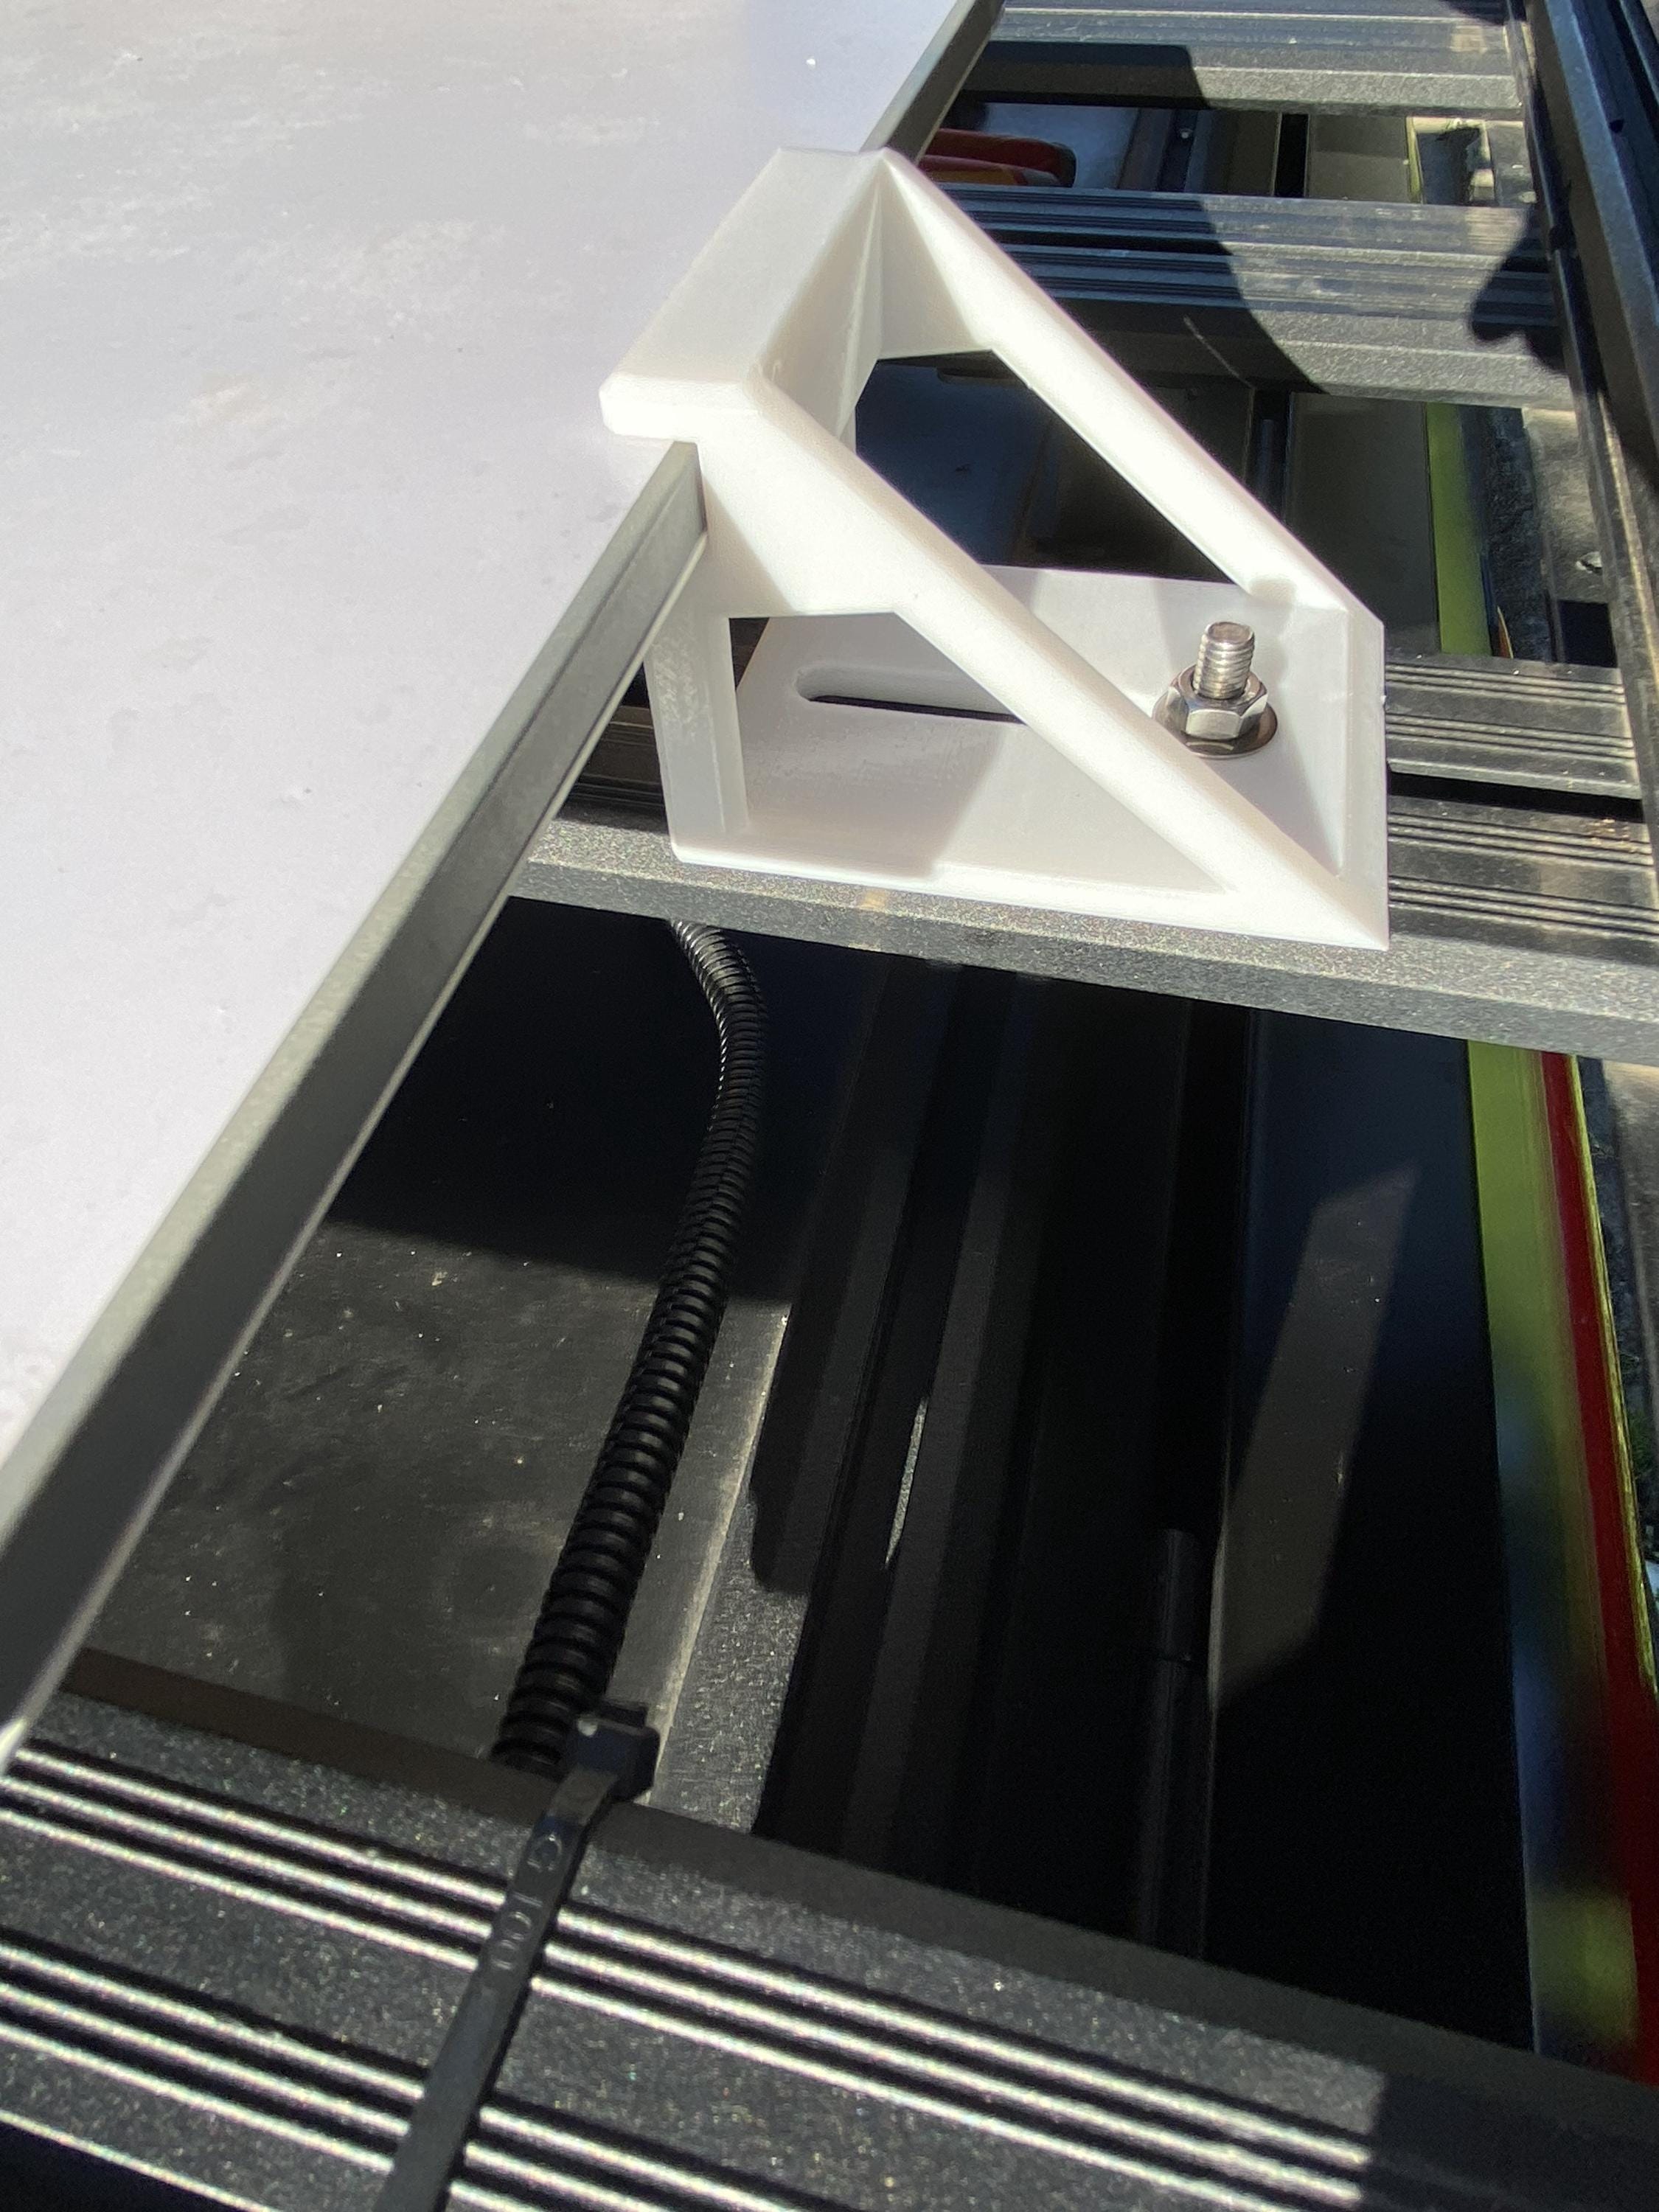
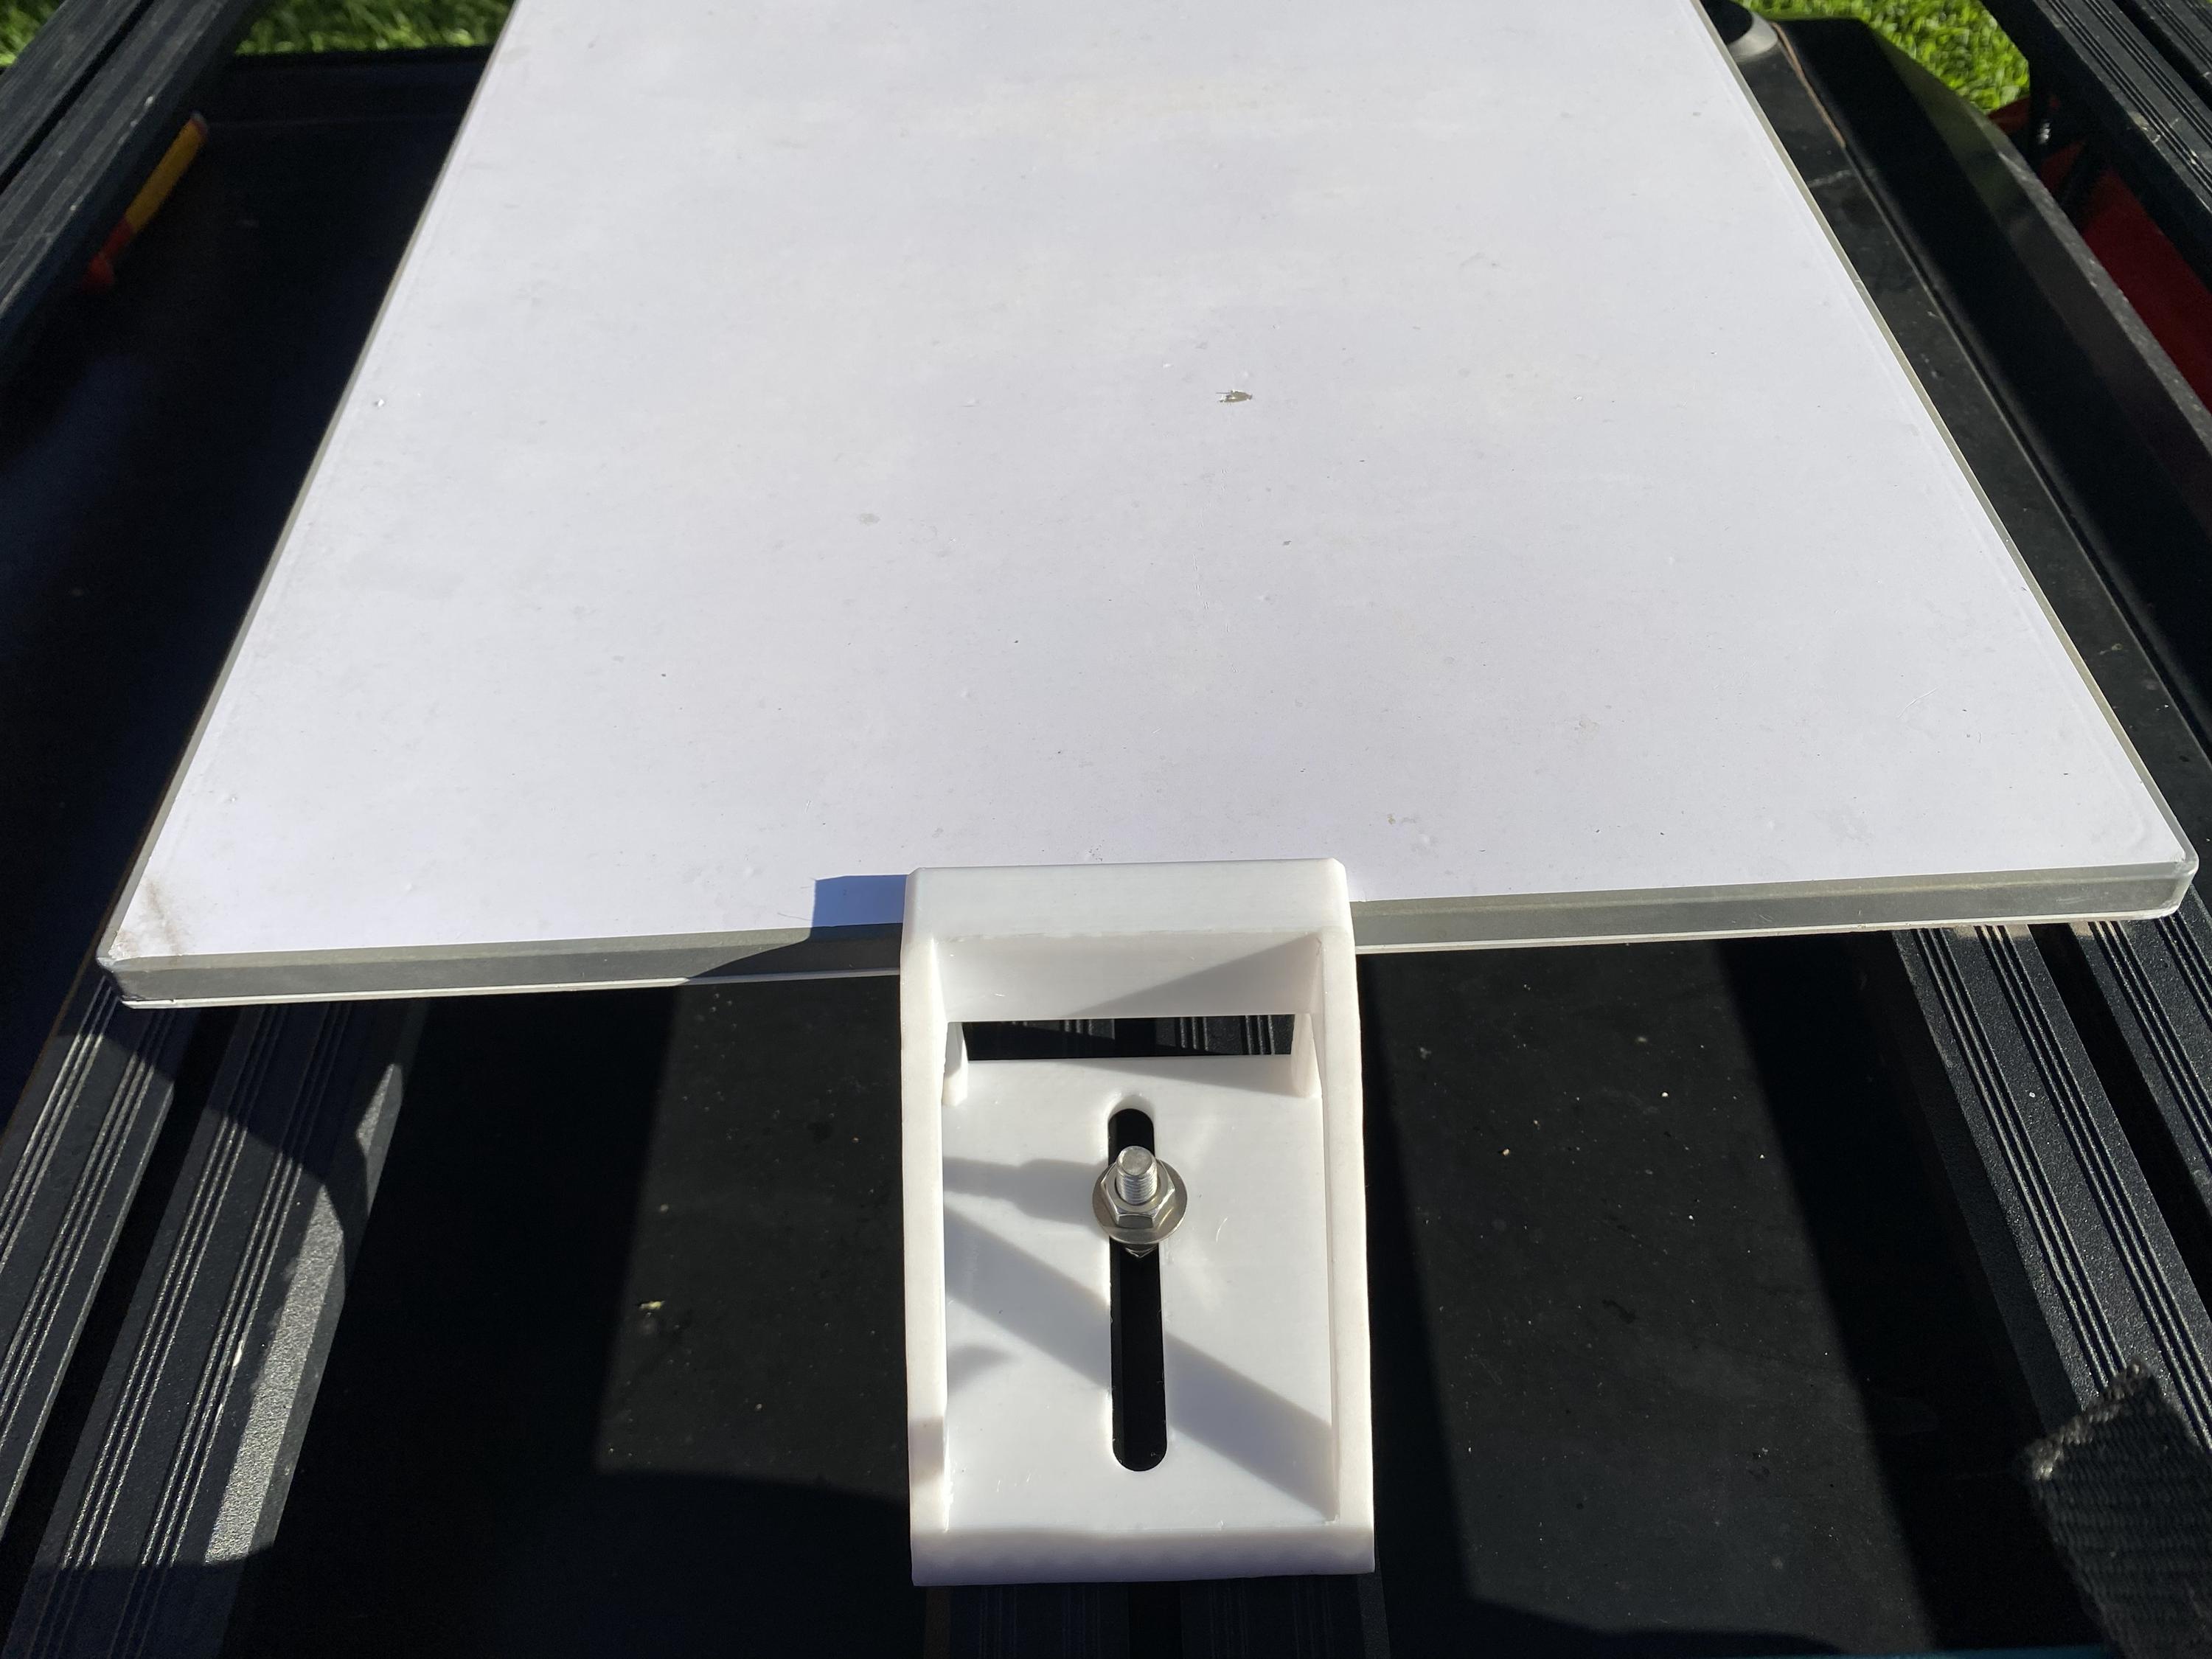
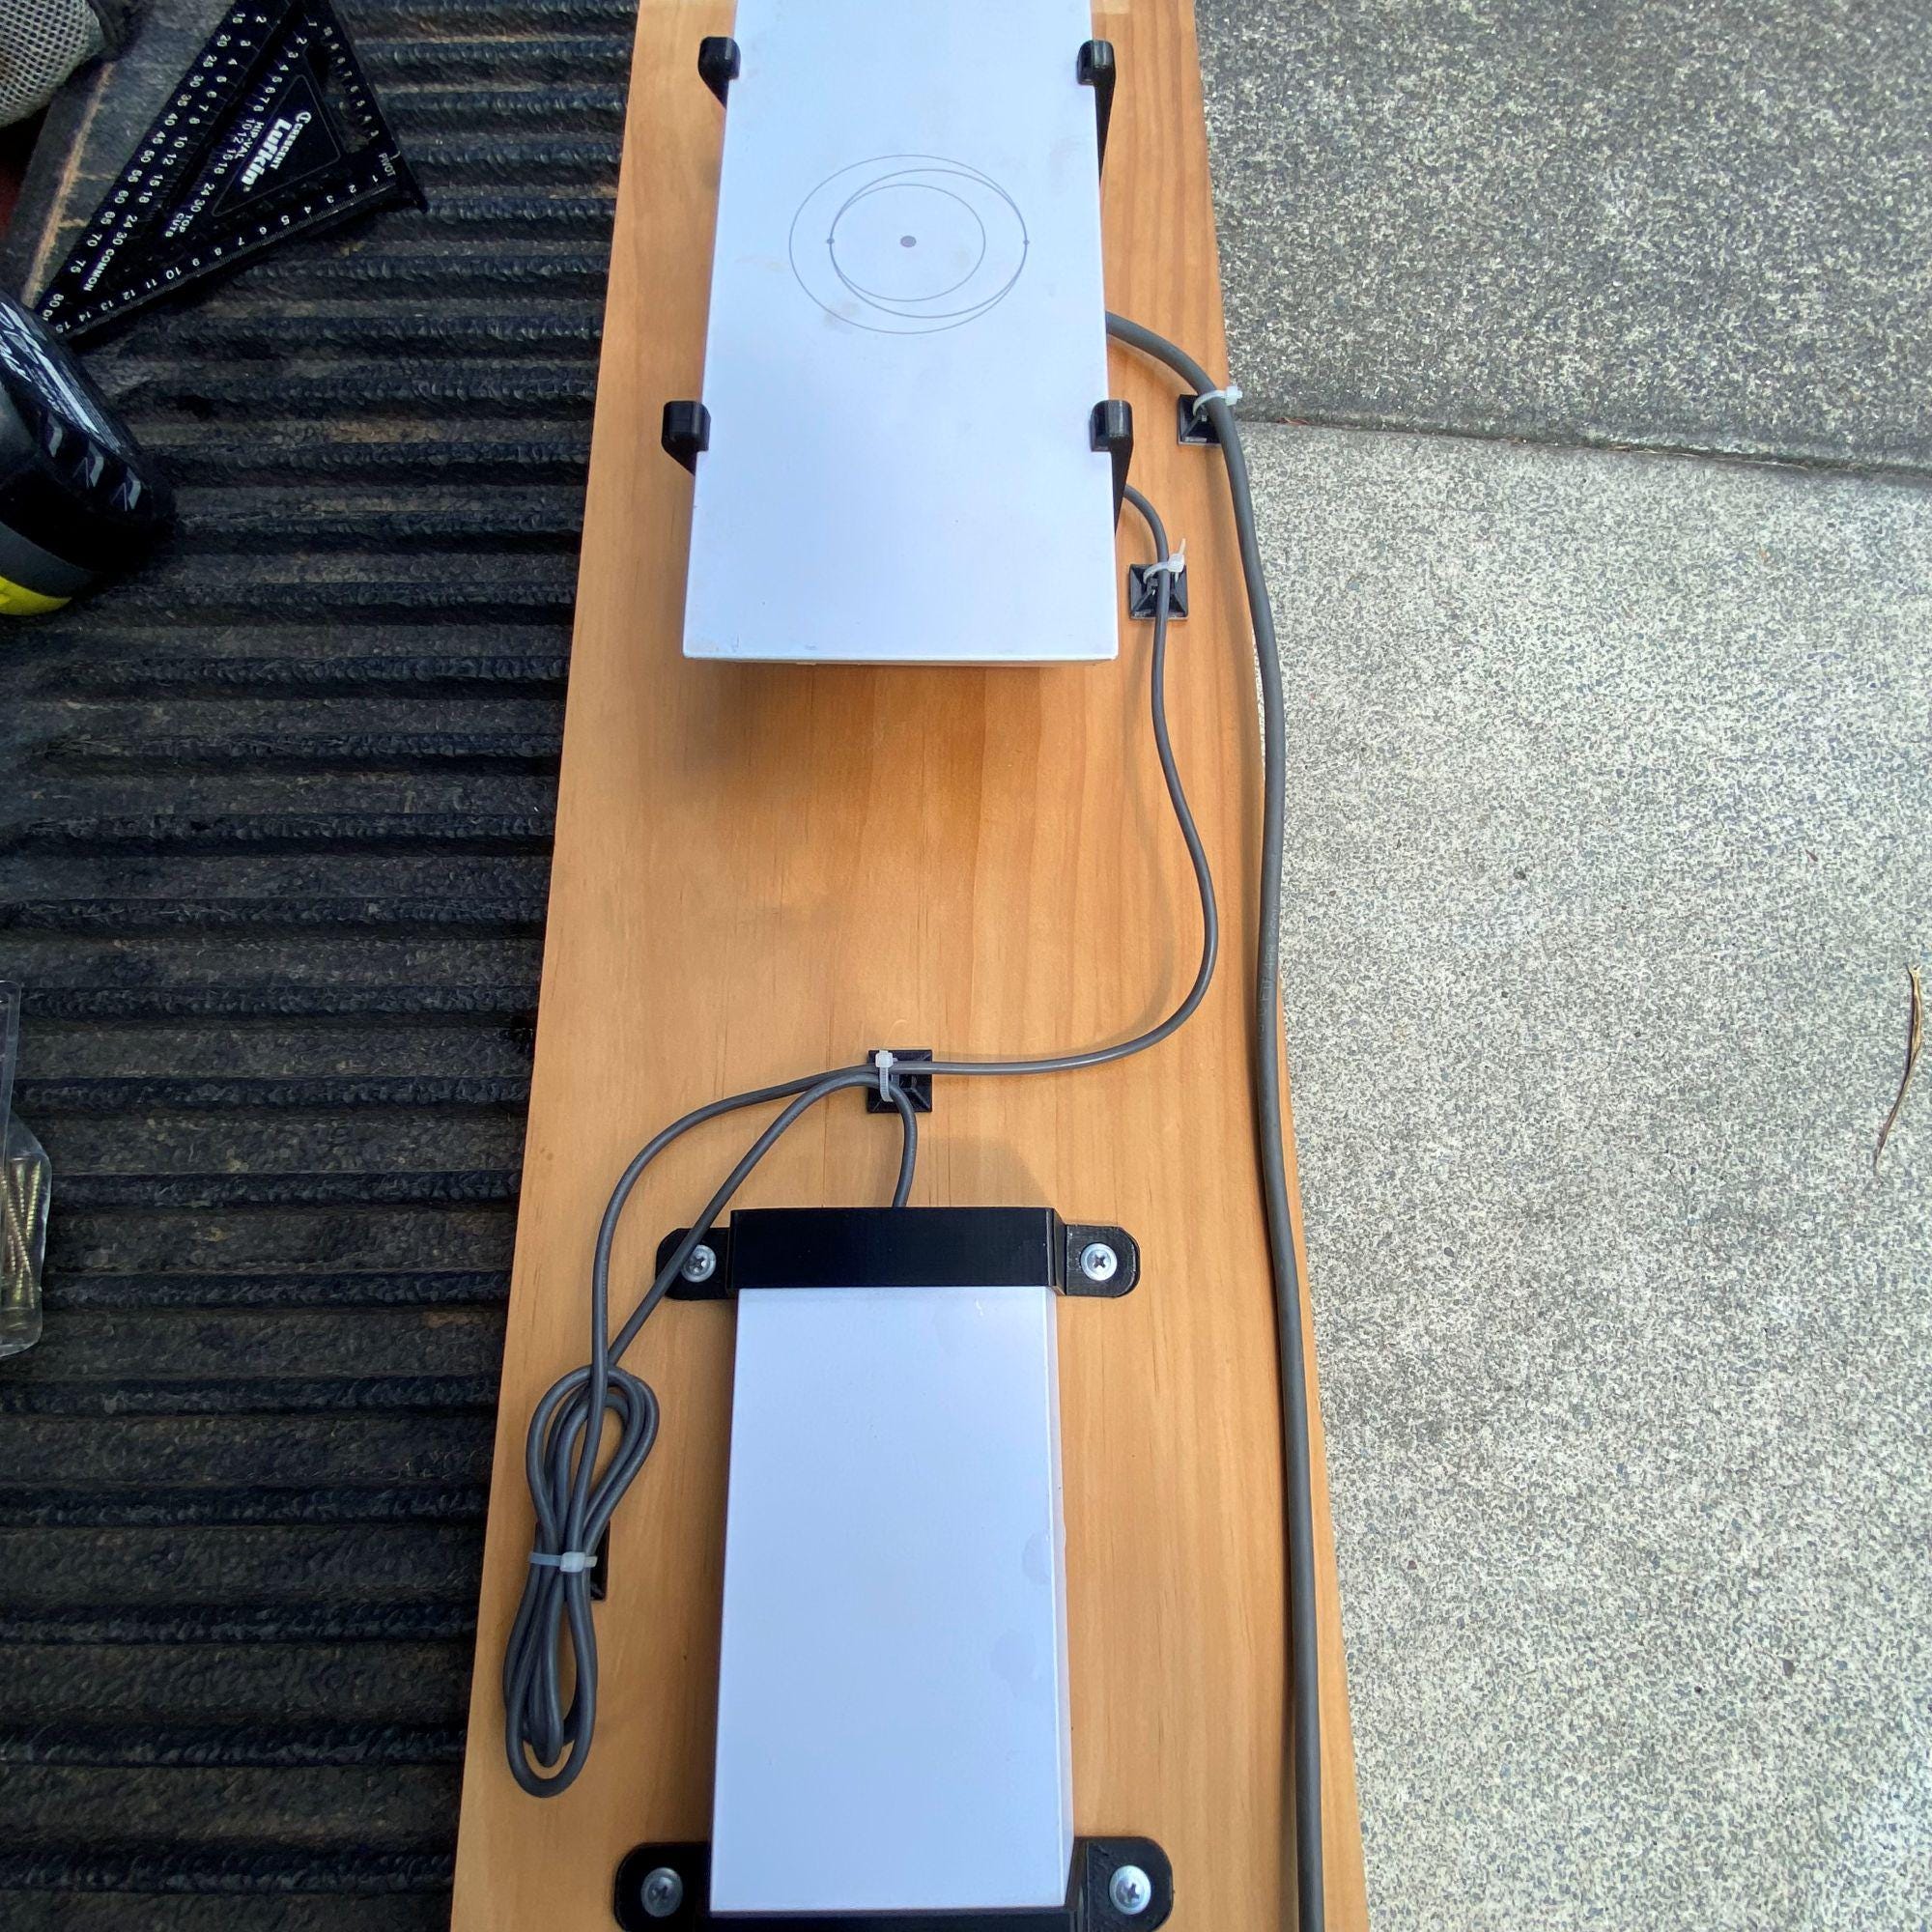
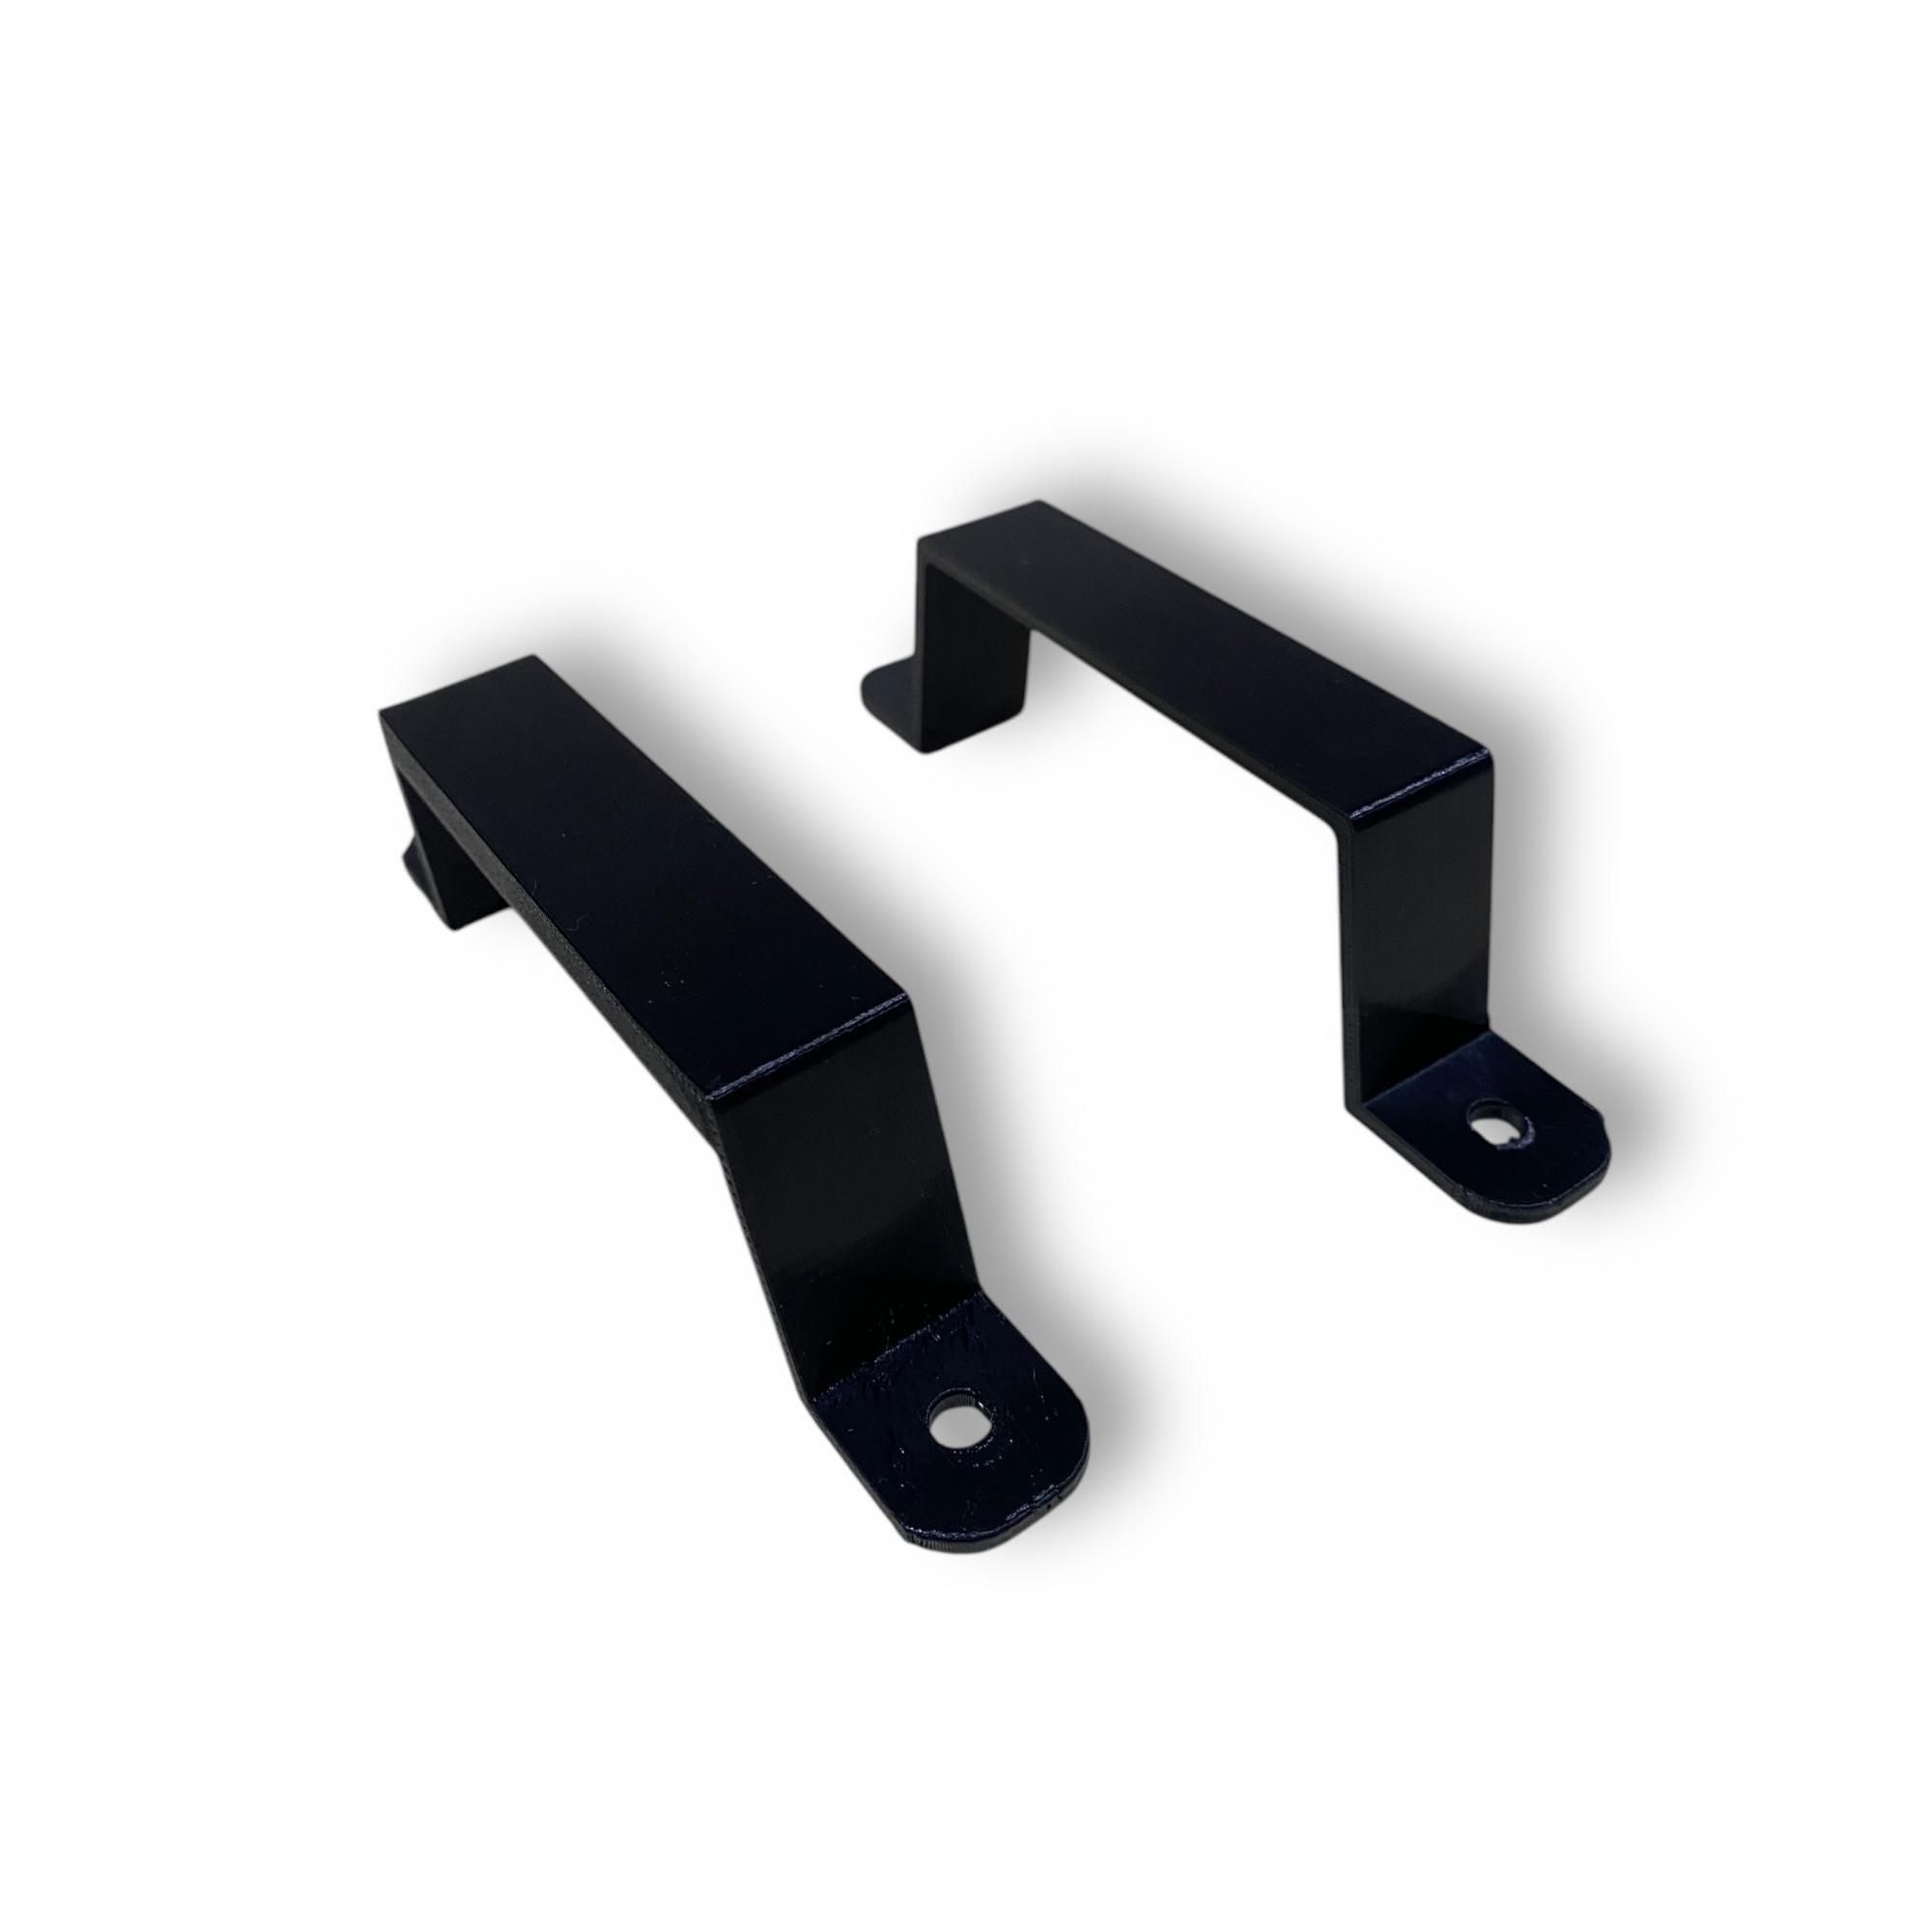
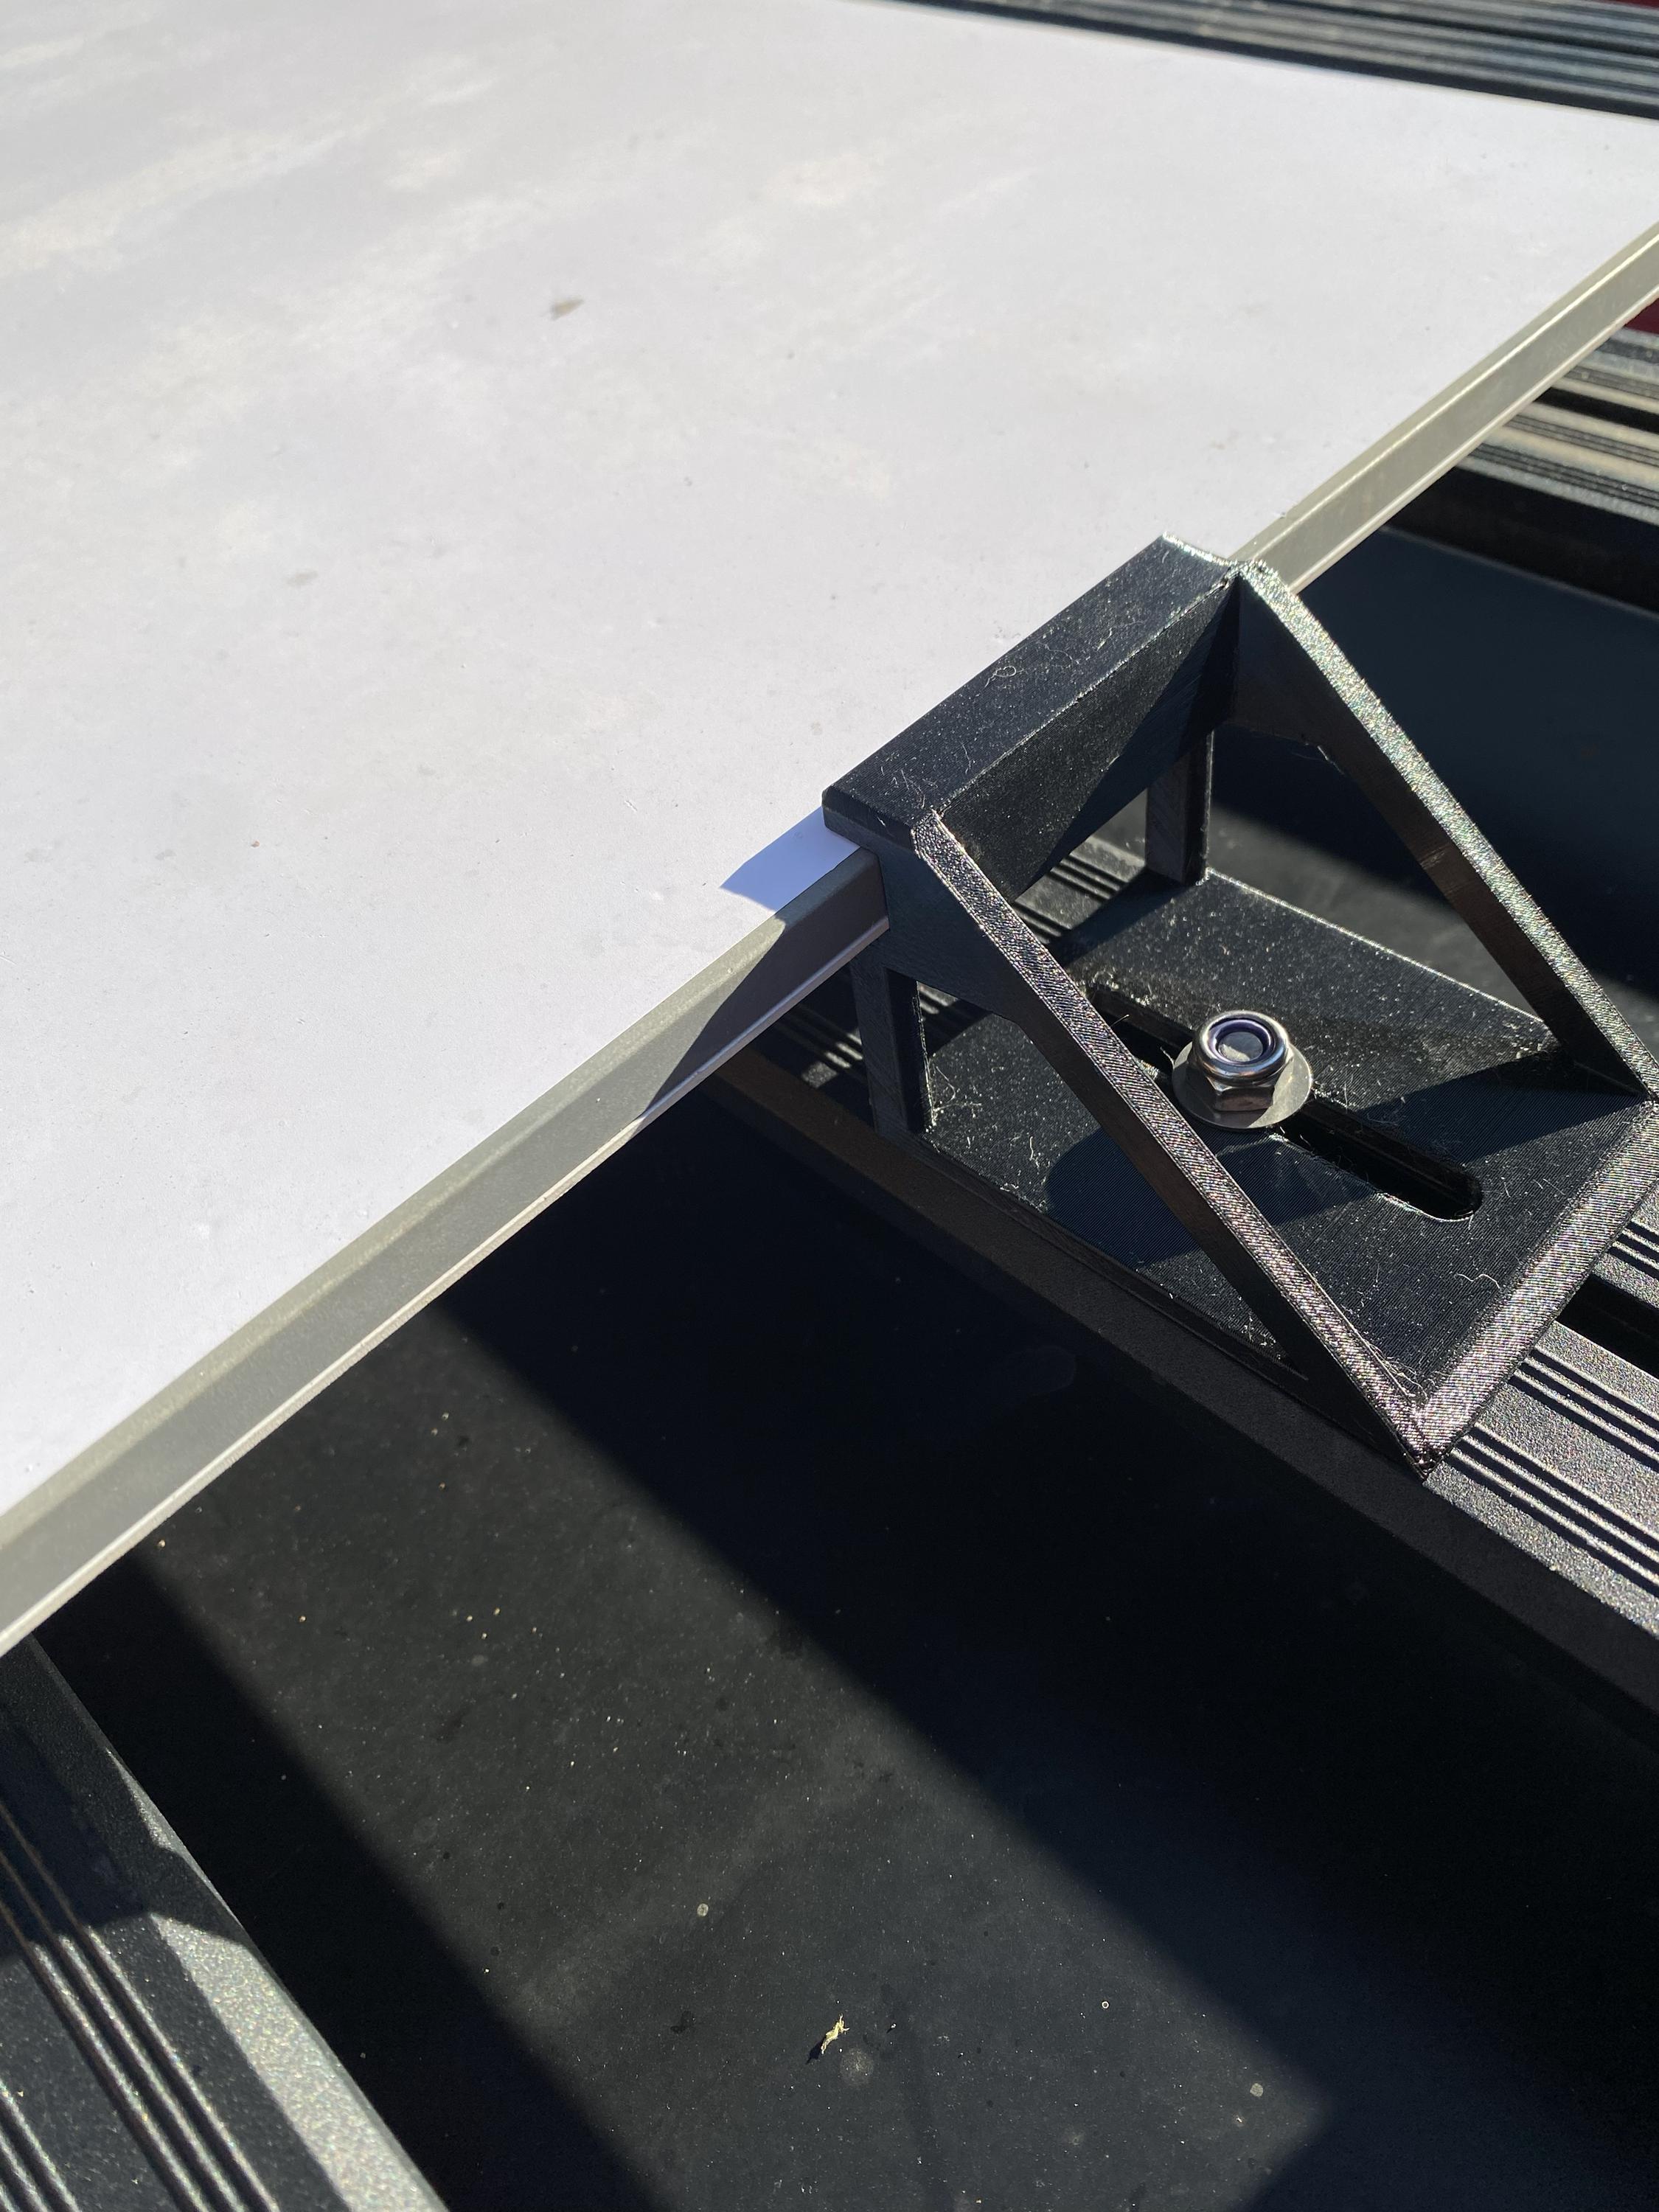
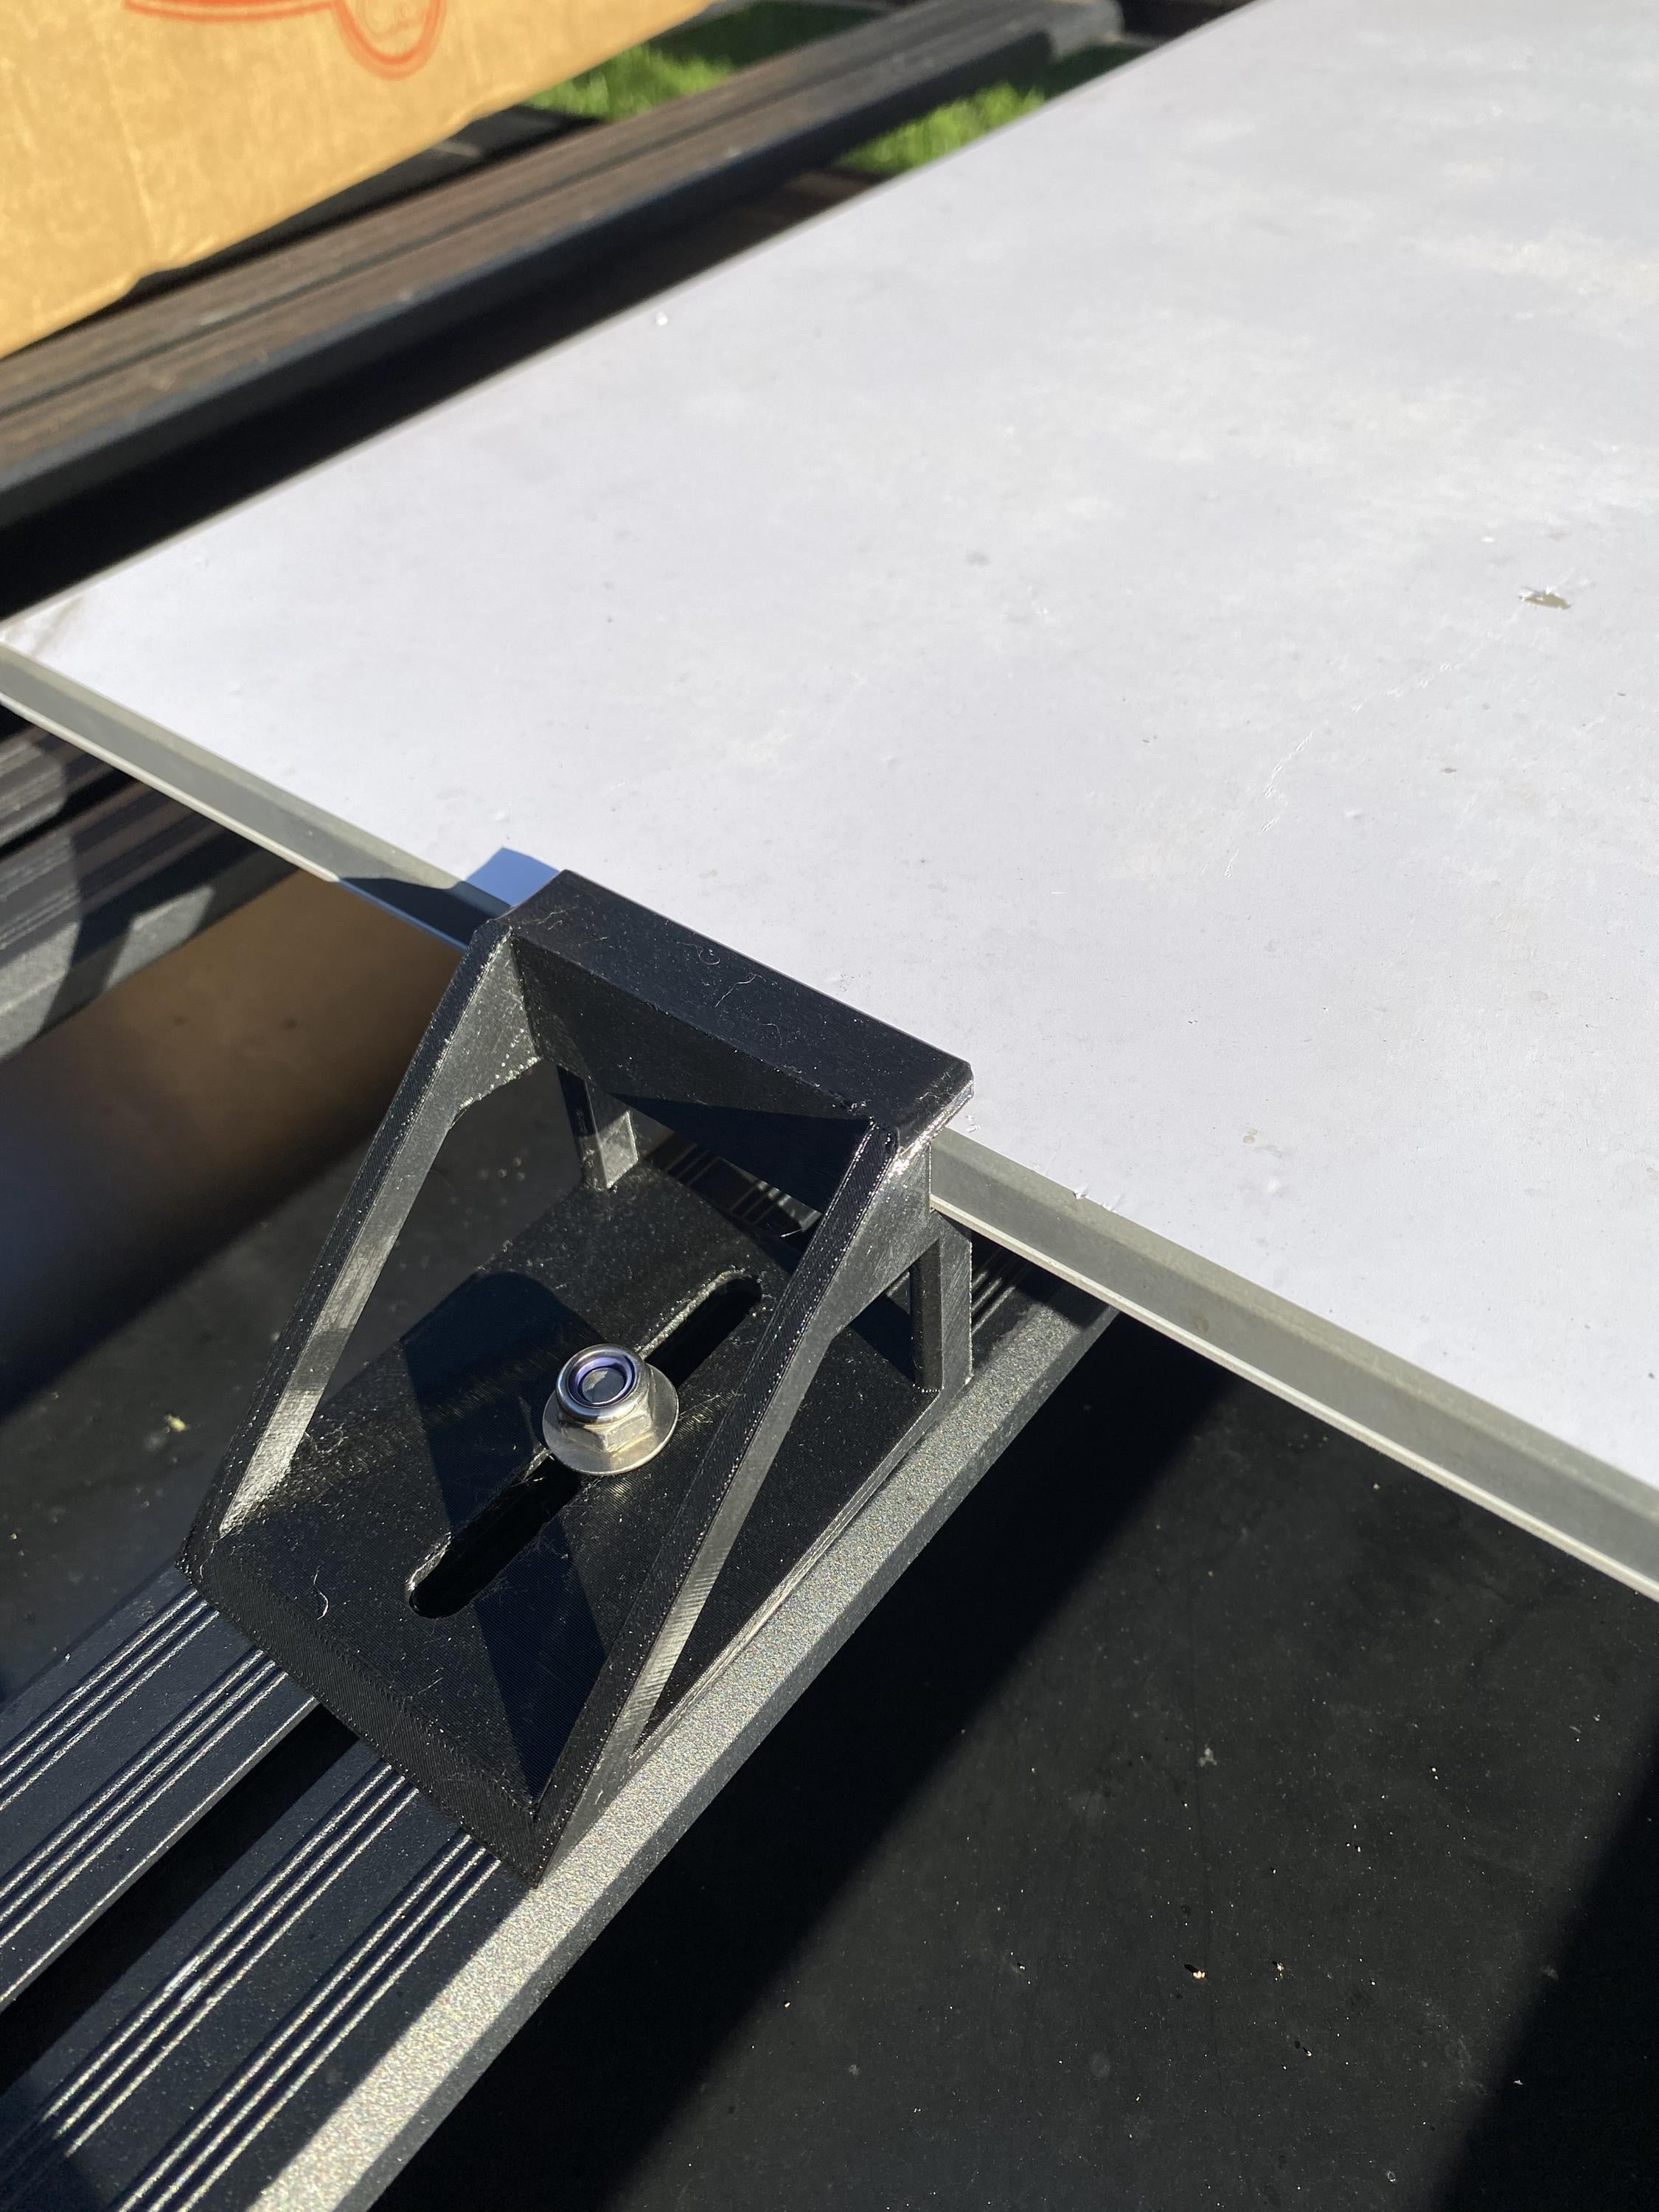
◉ Dish mount only — 4 x precision-fit PETG brackets, one per corner or side of your dish (Gen 3 or Mini). $65
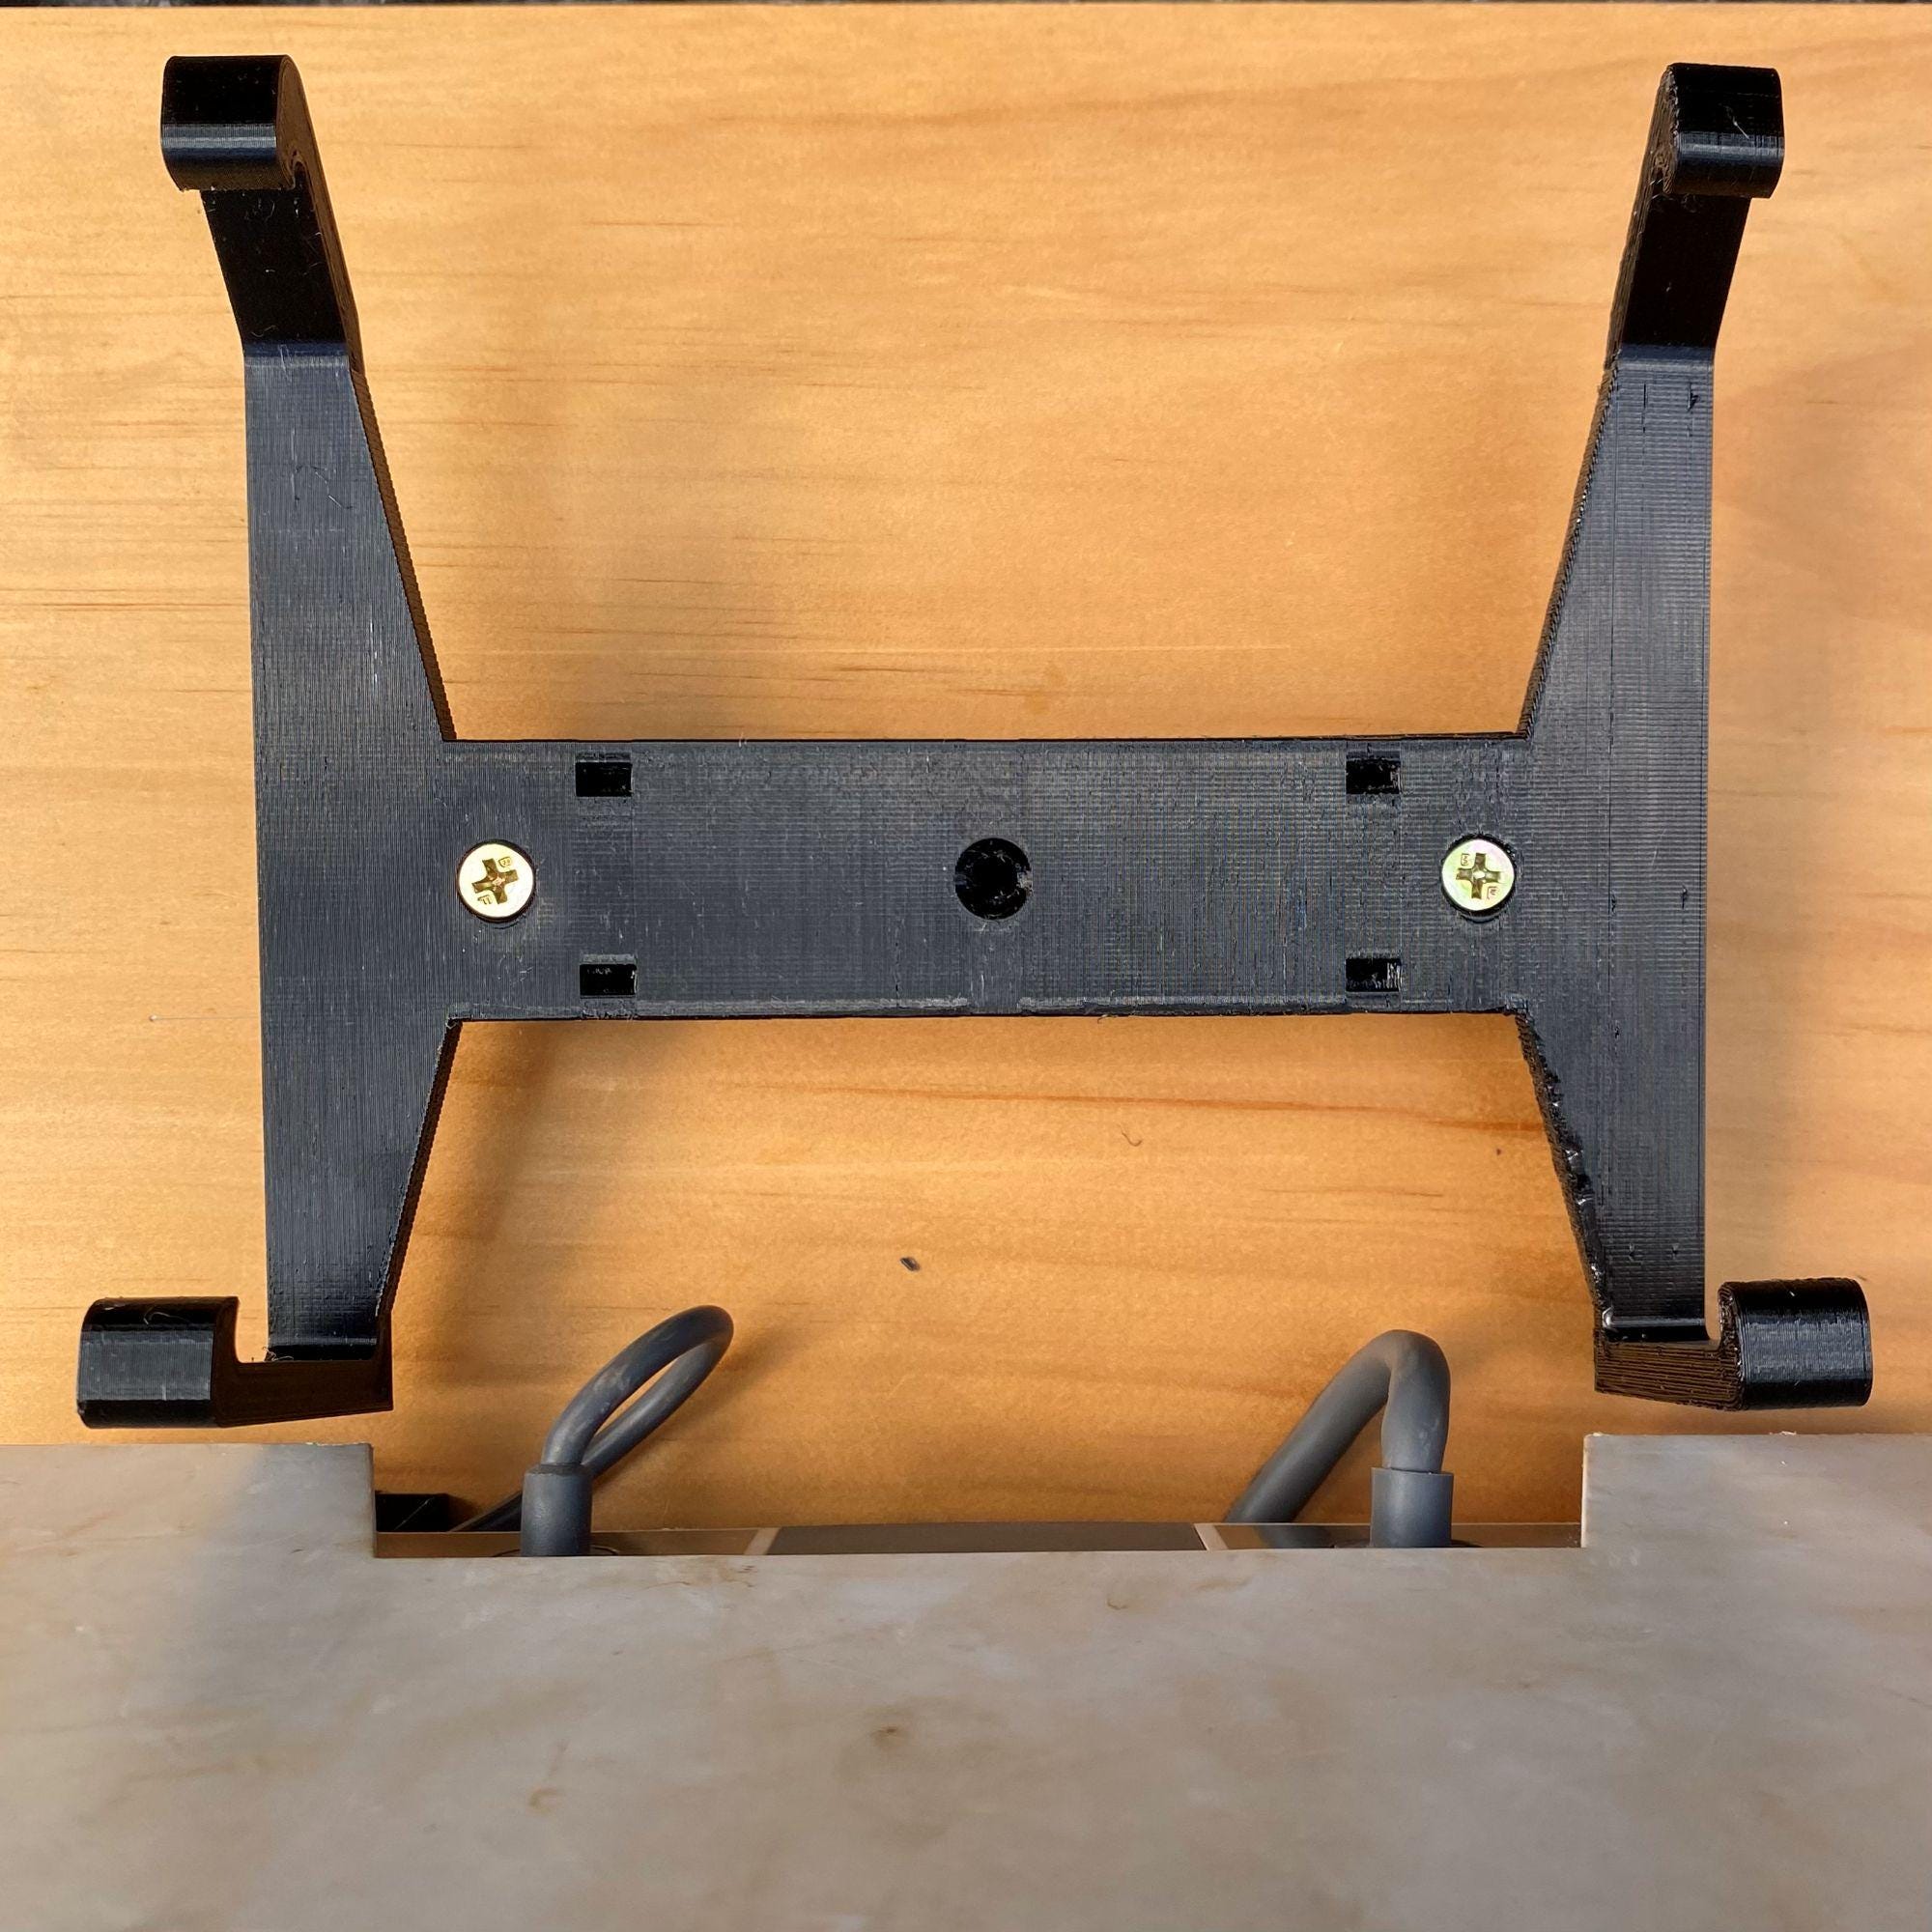
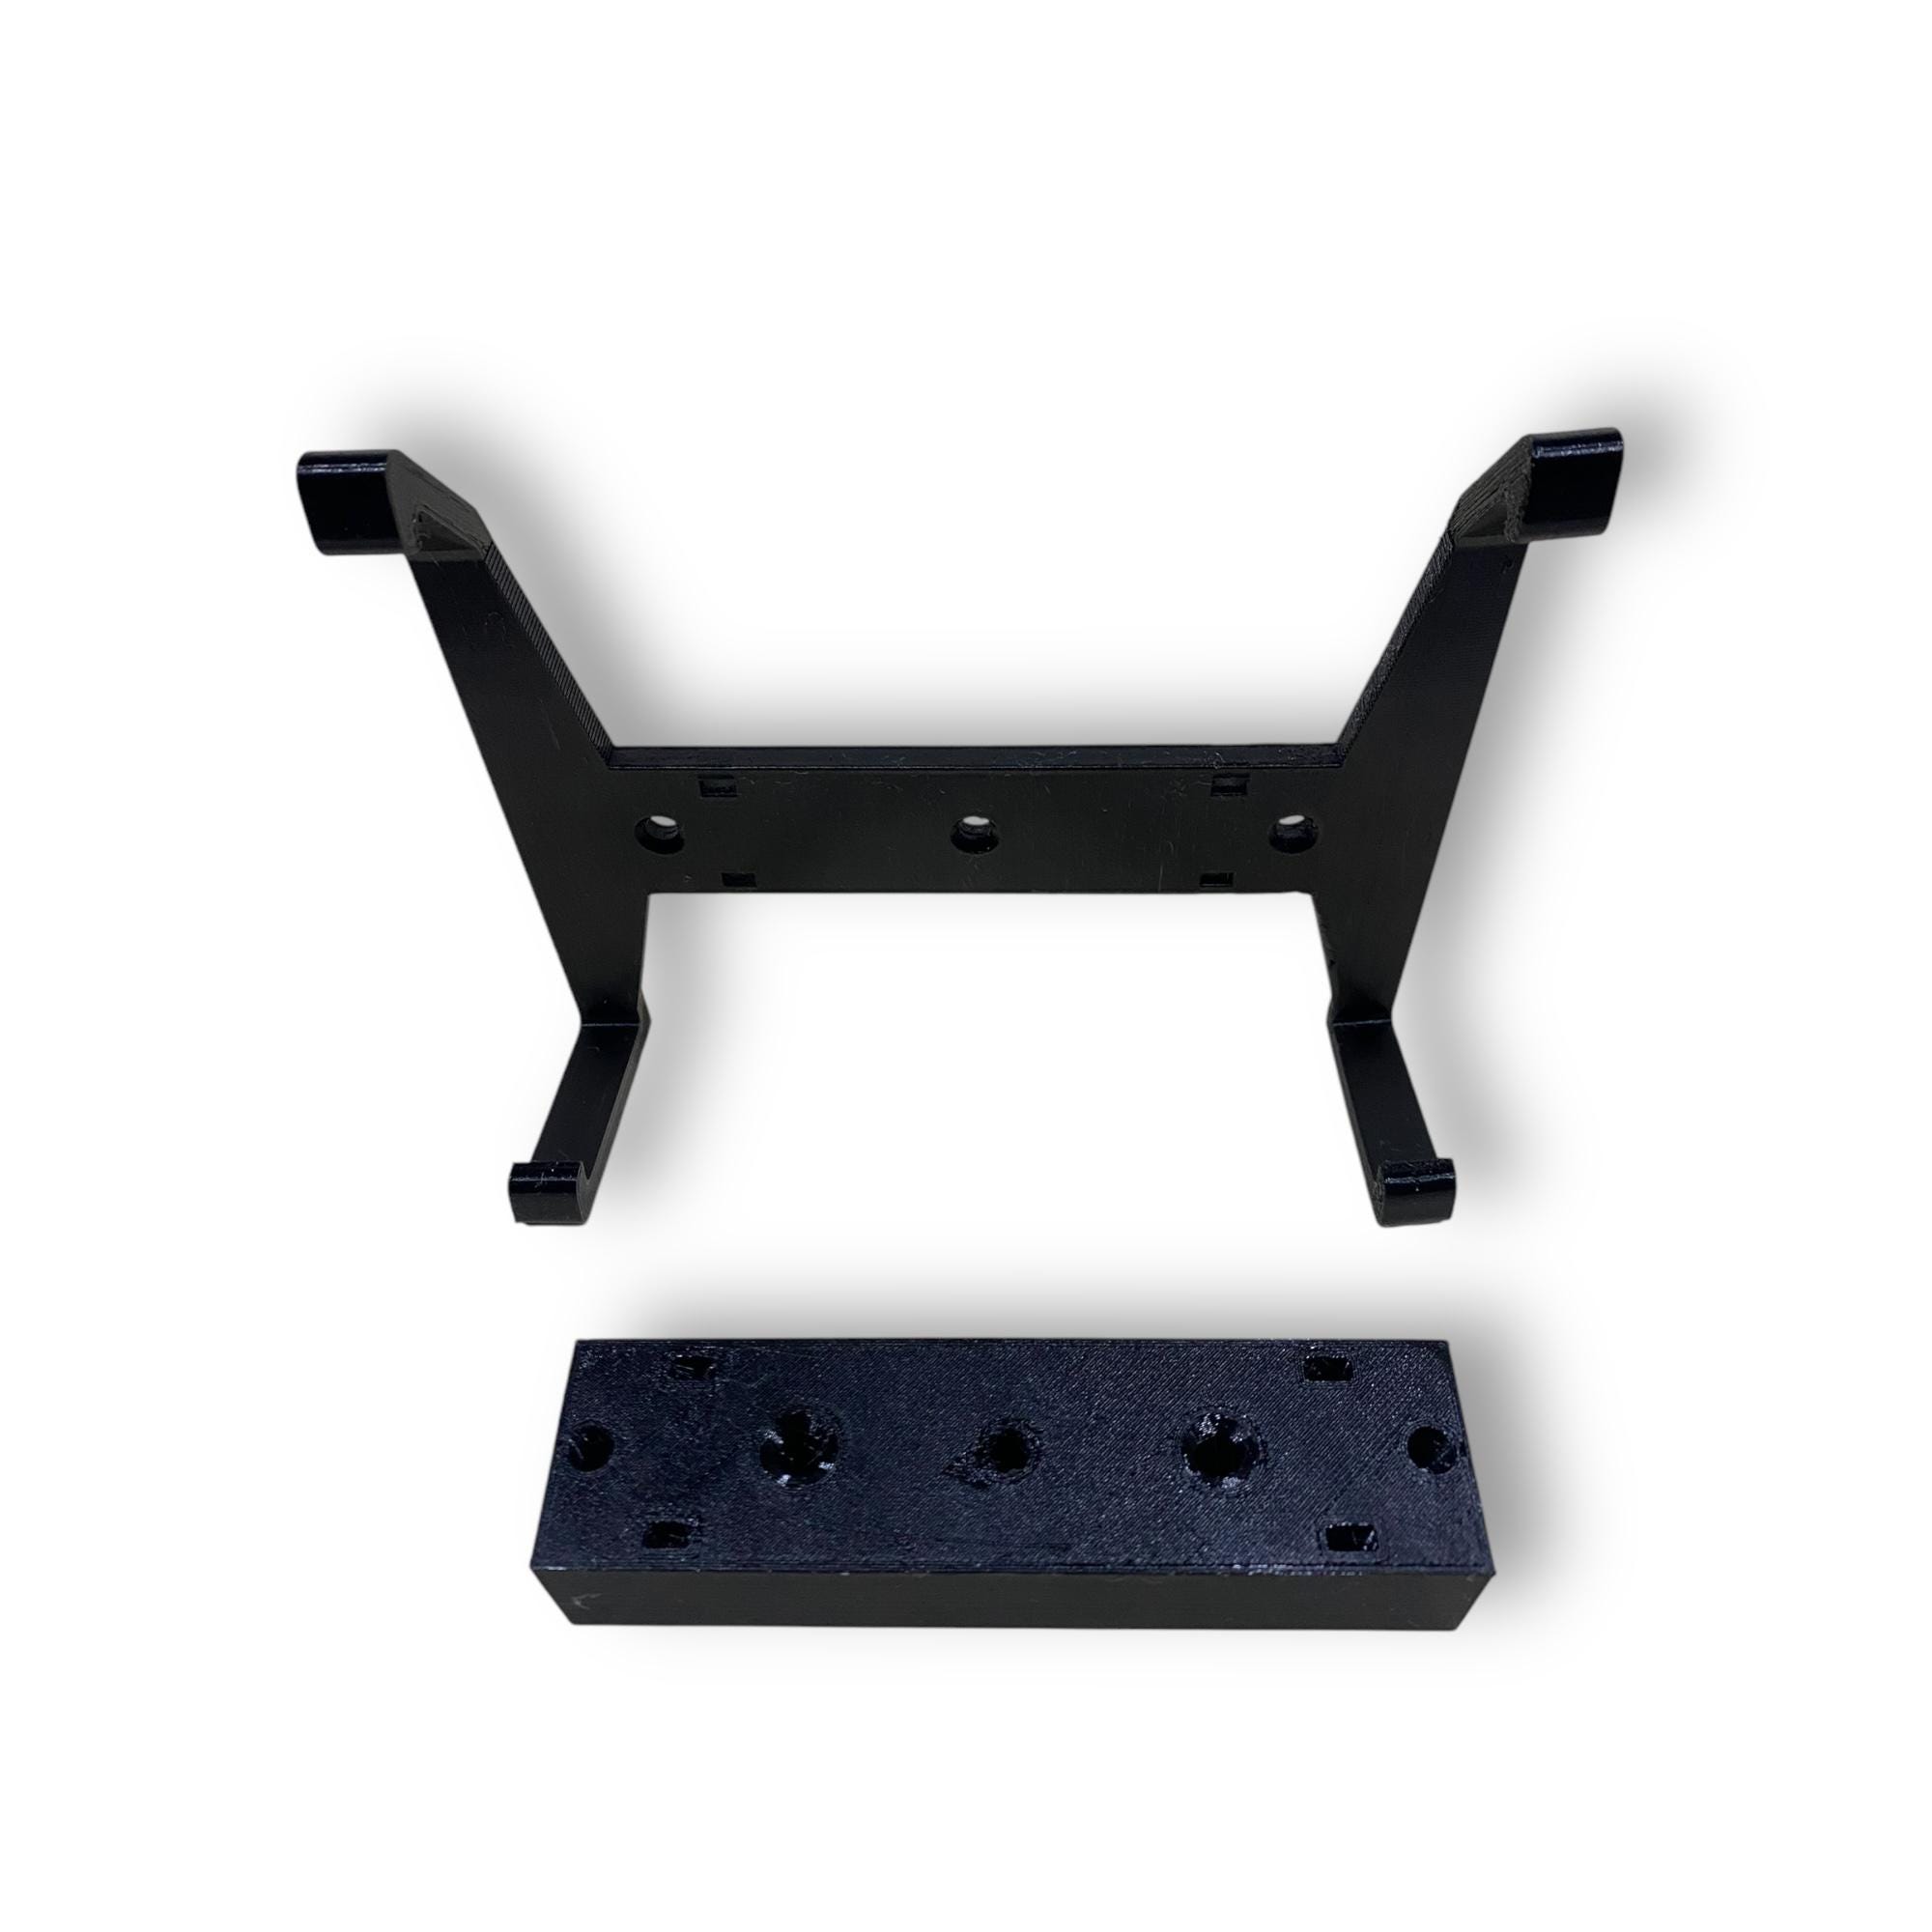
◉ Full kit (Gen 3 only) — dish mounts + power supply brackets (x2) + Wi-Fi router mount block and clip. Everything you need to run Starlink in motion. $90
Note: Mini dish does not require power supply or router brackets — dish mount only is the right choice for Mini.
─────────────────────────────
KEY FEATURES
─────────────────────────────
✔ Precision fit — designed specifically for Starlink Gen 3 and Mini dish corners
✔ Flat roof profile — lower drag, cleaner look, better aerodynamics at speed
✔ Quick release — slide one corner out and the whole mount comes free. No tools, no drama
✔ Run in motion — power supply and router mount included in full kit so you stay connected while driving
✔ PETG material — UV stable, lightweight, strong. Chosen for Australian conditions
✔ 100% Australian made — designed, printed and tested in Brisbane, QLD
✔ 2-year replacement guarantee against defects in materials and workmanship
─────────────────────────────
WHAT YOU'LL NEED (not included)
─────────────────────────────
· 8mm bolts, washers, locking nuts — quantity depends on your roof rack setup. Each bracket has 3 x 8mm holes
· Zip ties — recommended to add extra security to the base
· Cable protection — for routing power and data cables
· Tools: spanner or socket set
Important: do not overtighten. Use a washer. The brackets are not solid infill (saves weight) — overtightening will crack them.
─────────────────────────────
ROUTER BRACKET INSTALL NOTE
─────────────────────────────
Secure the mounting block first using the two countersunk holes. Place the router clip bracket on top and fix through the three countersunk holes. Load the router base-first, then clip the top edge in. On rough or corrugated roads, add a cable tie around the router as extra security.
─────────────────────────────
COMPATIBILITY & DISCLAIMER
─────────────────────────────
Compatible with Starlink Gen 3 Standard dish and Starlink Mini. In-motion internet requires an appropriate Starlink roaming plan. This product is independently designed and is not affiliated with Starlink or SpaceX.
Questions? Want a custom colour. Message us — we respond fast and are happy to help. -
Shipping & Policies
Related Products
